28 January 2011

Laptop Sleeve

I had a bit of time this week, and thought I'd try out something new - a sleeve for my laptop.

We live in an old house, and as is typical of old houses in this part of the world, we have a big kitchen where all the action takes place. So the laptop regularly sits on the kitchen table. And the problem with that is, it collects all sorts of dust (yes, I've discovered there are different types of dust - big dust, tiny dust, big flecks, little flecks), and little spots of God only knows what,  and scratches.

But not anymore, eheheh. Not with this bright sleeve I made.


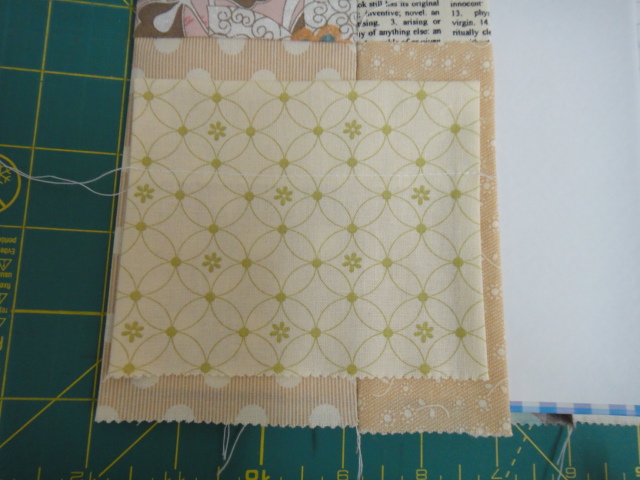
Some time ago I dug into my scrap box and randomly pieced together small pieces of scraps into rows. Then I trimmed the rows and joined them until I got a big square block. I made a few of these blocks and kept them aside.

I've never sewed a laptop sleeve before, and for my prototype I thought I'd dig out these scrap blocks and use them. For the flap however, I opted for just one print, in one of my favourites - Bloom by Hoffman.

I've lined the sleeve with batting, with some plain off-white muslin.

The flap is secured with a length of velcro.


This sleeve is custom made, because it has a hole at one end for the internet dongle, which we hardly ever remove. The idea was that we can store the laptop without having to remove the dongle. While practical for our purposes,  it does look a bit odd, so I don't think I'll incorporate this into the next laptop sleeve I make.


Not too bad for a first try, so I'm definitely making another. Just the excuse I need for more fabric shopping :-)

23 January 2011

Dream Big!

And it's all finished! The Dream Big blanket/bedspread.


Am really chuffed with the way it finished. It was surprisingly (and pleasantly!) easy to put the backing and binding on. 


I'm so, so tempted to make matching pillow covers now. But that will have to wait. I'm missing my quilting, so I hope my next project will have some quilting involved. In the meantime, I'll be enjoying my new blanket :-)

Hope everyone had a happy weekend!


21 January 2011

Dreaming Big

Okay, I've got my backing fabric for my Dream Big quilt top.

All six meters of it.

Had a bit of reservations about the colour initially, but I suppose this was my fault, for my instructions to Yummy Hubby were literally to get 6 meters of fabric "in any shade of bleu."


I've measured out the top, and 6 meters is more than enough, in fact, 6 yards would have done the job.

So this weekend's fun will be putting everything together :-)

PS. Just so you know, I've more or less decided that I'm NOT using batting for this project. The mere thought of quilting something this size is just waaay to intimidating...

Pictures soon to come, so watch this space!

Happy weekend everyone!

17 January 2011

Quiet?

Ok, yes, I admit. I've been quiet.

Many things are happening, but worry not, I won't be boring you with the non-fabric related ones. So yes, I've been quiet, but by no means have I been idle.

I've managed to sew little bits and bobs, a little here and there, so I'm going to show you a couple of the UFO's which I plan (fingers crossed) to have finished up soon.

And so the first, is this:


Fabric was dug up from my existing stash (to make room for new stash yippee!). Made up of basically four different fabric : 2 coordinating prints and 2 solids:


A project made out of necessity really: this is to be a bedspread for our bed, to keep our Angel and Demon (aka Milo and Molly) off the sheets.

The finish top is HUGE, as the bed is a king. I'm trying to sweet talk Yummy Hubby to run to the shop one of these days to purchase some fabric for the backing. I've made my calculations, and I'm estimating I need about 6 metres at least - Yes, it IS that huge.

The top is constructed from  2 types of blocks, a big diamond of sorts, and smaller pinwheels for the border.


My dilemma now is I'm not sure whether to include batting in my layers, or just do the blankie thing and use only the backing fabric. Yummy Hubby says no batting (perpetually hot as he is), but I'm leaning towards including the batting (ambitious as I am). I have a feeling I will cry chicken in the end and take the easy no-batting way out.

On to my second UFO. Remember how I said last year that I should really try out more applique? Well, I thought I'd start out the new year with an applique quilt.  I'm starting with an easy one. Easy because the applique shapes are BIG flowers. None of the tiny intricate stuff for me, unfortunately. We must leave those to the patient and the experts.

Here's a sneak preview of my applique flowers. I'm machine-stiching the edges with a zig zag stich. I've gotta tell you though, this was a challenge.


More practice required DEFINITELY. And if anyone's got any applique tips I'd be more than grateful!

Updates coming soon.

Have a good week everyone!

09 January 2011

A New Book for the New Year

Hello sewing friends!

I hope the new year has been good to you so far...

I've been rather busy, and as usual I have a book to help me keep track of appointments. What's more I use it to pen in resolutions (lots of fabric activities planned!) and various notes. This year I decided to do away with the normal corporate diaries that I usually carry around with me, and made my own little notebook. There's nothing really extraordinary about this little book, it's all in the 'dressing'.

So take 1 ordinary hard cover notebook. I chose a fairly thick one, to allow for plenty of pages for notes, sketches and ideas.

Before I go on, please note that this is not a detailed tutorial, but there're plenty of pictures and information for you to get the idea if you decide to make one too.


For the cover, I pieced together 8 leftover charms that I had lying around. These are from Moda's Blush and Authentic line. Sew them together into 2 rows of 5 charms. For my book cover, the first and last charms were cut in half to make two 2 1/2 x 5 inch rectangles.


Now take your notebook and lay the cover flat onto the pieced cover. Fold and mark where you want the inside (front and back) flaps to be.


I wanted a pocket to slot in my bits, so I used an extra charm and stitched it onto the front inside flap.


With right sides facing, stitch along the top and bottom, over the inside front and back flaps. Like so:-


 Turn inside out, press and slip in the covers of the notebook, and admire!


For this book I also added a ribbon marker and a pen holder, which is basically a small loop of cloth stitched onto the cover.

I've been using this notebook this past week, and can't help admiring it every so often :-) 

And the best bit about it is I can always make a new cover (or maybe several?) and give it an instant makeover, hu hu!

Hope you have a happy week ahead! Don't forget to throw in some of the ingredients from the Special Recipe into your day now and then :-)