I had to sit down to make one for mum this afternoon - she wasn't fooled about the fabric boxes from this post, heheh. So while I was at it I thought I may as well make another spare. You know, just in case. And while I was making the spare I thought I may as well record the process to share. (Apologies in advance for the picture heavy post!)
So, here's my version of the eye-glass case:
First up you need 2 sets of fabric: the Front and the Back.
For the Front cut a 3.5" X 8" piece from each of your exterior fabric, lining fabric and some batting.
For the Back, cut a 6.5" X 8" piece from each of the exterior fabric, lining fabric and some batting.
I'm using a velcro closure so you'll need a length of velcro also, about 2 inches (sorry, I forgot to include the velcro in the photo).
(Note : there's a bit of scrap fabric too on the top left of the picture, which I'm going to use to make a decorative bow for my case. You won't need this extra fabric if you're making a plain case.)
Starting with the Front, take your exterior fabric and line it up with the batting and lining like this:
The lining and exterior fabrics should be right sides together.
Sew all layers of the Front sandwich along one long edge:
Flip the exterior fabric over and sew one length of velcro in the centre on the right side, about 1/2 inch from the sewn (top) edge:
Flip the exterior back over the other 2 layers (the batting will now be in between the exterior and lining fabrics) and top stitch the edge of the top through all layers:
Now we can bring in the Back.
Place your (finished) Front sandwich right side up on the Back lining and batting, like this:
Line everything up nicely and sew very close to the edge on both edges. This is just to keep everything in place so that it doesn't shift during the next steps.
Now you can sew on the other piece of velcro on the lining of the Back, like in the next picture. Sew about 1/2 inch from the top edge.
Now we can put everything together, huhu! Take your Back exterior fabric and lay it right side down over the entire piece, like this:
Make sure all layers are nicely lined up.
Now, I wanted my flap to have a rounded edge, so I marked out the curves at this stage, using a spray can as a guide, like this:
Next sew along the entire thing about 1/4 inch from the edge, leaving about a 2-3" gap (for turning) at the top of the flap. Trim off excess fabric and batting, and clip the corners.
Turn the entire thing over through the gap at the top:
And you should end up with something like this next photo - yippee!
Almost finished now!!! Top stitch close to the edge along the entire flap, sewing over the gap, anddddd........
we're finished! You will now have a cute little eye-glass case!
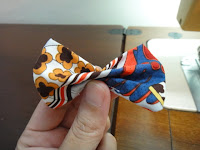
Ok, the next step is purely optional, if you want a decorative bow. Cut 2 rectangles from your scrap piece of fabric measuring 3" X 4" (Bow) and 2" X 3" (Band) respectively. Sew along the edges as marked in the photo below, leaving a small gap on the Bow piece for turning:
Turn both pieces inside out, and sew the gap on the Bow piece closed. You will end up with two pieces that look like this:
Wrap the Band around the middle of the Bow, trimming off excess length, then attach to the front of the flap of your eyeglass case. You can hand-sew this step, but I was lazy and squeezed everything under my machine's needle.
Now all you have left to do is step back and admire your handiwork, heee!
Hope everyone's having a great weekend!


No comments:
Post a Comment